
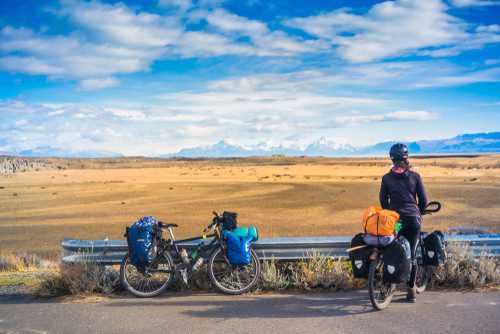
People often buy a gravel bike because they don’t want to be limited to riding on pavement. Instead, they’re interested in getting off the pavement to explore gravel and dirt roads. But what happens if a gravel bike owner wants to use it for touring?
Gravel bikes can be used for touring, but some bikes are better suited for touring than others. For example, some gravel bikes are designed to be more like road bikes and don’t provide the comfort needed for long tours, and they often cannot carry the gear required for touring.
Since touring bikes aren’t cheap, it makes sense that you want to find out if you can convert your less expensive gravel bike into one that will let you take a tour trip. This article will explain how touring and gravel bikes are different, whether you can take a gravel bike for long distances and give you some modification tips so you can convert your bike for a touring ride.
Are Gravel Bikes the Same As Touring Bikes?
Gravel bikes are not the same as touring bikes. Touring bikes often have front and rear racks to carry luggage and tend to be heavier. Gravel bikes have wider tires and are more lightweight. With that said, you can use a gravel bike for touring, but minor modifications are recommended.
Even though the two bikes have more than superficial differences, it doesn’t mean you can’t use a gravel bike for touring. However, knowing how they’re different can help you understand what modifications you might need to make to a gravel bike for a successful tour.
Are Gravel Bikes Good for Long Distances?
Gravel bikes can be used for long distances. However, some features of gravel bikes make long-distance travel a pain. Fortunately, you can update a gravel bike for touring by changing out the tires, upgrading the saddle, adding racks for gear, and using a clipless system.
The tires on a gravel bike aren’t suited for long-distance travel and the saddle may prove uncomfortable after a few hours. In addition, gravel bikes don’t usually come equipped with mounts for gear like extra water bottles.
By upgrading your gravel bike using inspiration from touring bikes, you can ensure a safer, more comfortable long-distance trip.
If you wish to update a gravel bike for touring, consider some of these tips:
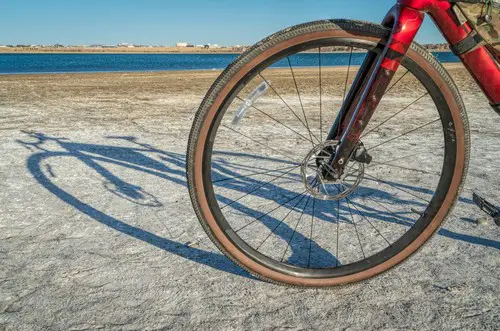
Change Out the Tires
The thicker, low psi tires are great for riding off-road, but the additional resistance makes you work too hard for touring. Downsize your tires as much as the wheels will allow.
When you select tires, don’t overlook tire treads.
- Slick tires have little tread and work best on asphalt surfaces.
- Semi-slick tires have aggressive side treads and a smooth center. As a result, they can handle smooth surfaces and some off-road terrain.
- Inverted tread tires are better equipped for off-road riding. However, they’re slower on asphalt.
If you’re planning some off-road cycling, then semi-slick is a compromise between speed and rough terrain riding.
Regarding tubeless or not—tubeless tires aren’t puncture-proof. Mounting them takes longer, you’ll need to take an emergency tube and sealant with you, and a way to quickly add air—like a small air compressor or CO² cartridge.
Puncture-resistant tires are pricier, but they reduce the risk of a flat. However, they’re heavier than other tires.
Change the Position of Your Saddle
You need a more comfortable saddle for touring, especially since the gravel bike saddle positioning isn’t ideal for long distances. You also need to set it to the height that’s best for longer rides.
Several approaches exist to find an ideal saddle height.
Heel-To-Pedal
The first is the heel-to-pedal. It’s a good ballpark method. Next, sit on the bike, whether leaning against a wall or holding onto something like a table or chair.
Put the heel on the pedal and pedal back to the 6 p.m. position. You should have a totally straight knee.
If you still have a bend in your knee, increase the height of the saddle in tiny increments, and you must drop the saddle if your heel loses contact with the pedal.
Since this method doesn’t take your personal pedaling style into account, cyclists and their coaches have developed additional ways of determining saddle height.
LeMond Method
A common one is the LeMond method, where you measure your inseam while sitting on the bike and multiply that figure by 0.883 to determine the height of the saddle.
This method doesn’t consider factors such as the stack height of the pedals, the thickness of the soles, and the length of the legs compared to the torso. So other formulas, such as the 109% and the 1.05 to 1.07, can also be used.
Heel-To-Pedal and “Feel” of the Ride
A third variation is a combination of heel-to-pedal and the “feel” of the ride. Start with a heel-to-pedal measurement and then ride. Your lower back and hips will let you know if the saddle measurement is correct.
Some bike shops will do saddle fittings as a service—ask if they have a bike fitter on staff.
There are many saddle choices available for bicycles of all styles.
For example, Brooks Leather Bike Seat available on Amazon.com is elegantly crafted and properly shaped for the rider’s comfort. As the leather breaks in, it conforms to your body, giving you a personalized saddle. And the leather’s invisible pores offer natural ventilation that keeps you cool even during hot days.
Add Racks and Other Ways To Carry Gear
You can’t go touring without a way to carry your gear, and you can’t take all your gear on your back, so your bike must be able to add racks on the front and rear (and ideally fenders also.) If you can’t add racks, this can be a deal-breaker.
Also, if your gravel bike doesn’t have eyelets on the drop-out for a rack, touring will be frustrating as you’ll not be able to carry much beyond what fits into a backpack.
Handlebar bags, like the Topeak Compact Handlebar Bag available on Amazon.com, are a solution for gravel bikes that won’t allow for front racks. It’s lightweight, has two compartments, and has a quick connect attachment method. This top of the line Topeak’s handlebar bag available on Amazon.com includes a light mount, rain cover, reflective strip, and a top-mounted pocket that holds a GPS device.
Consider Switching Your Handlebars
Drop handlebars are standard on both gravel and touring bikes because they allow for a variety of hand positions, which makes for a more comfortable ride on rough terrain. Also, many touring cyclists like the aerodynamics from leaning forward.
Not everyone is sold on them, however. Although you can change hand position to prevent neck or shoulder aches, leaning forward for extended time periods adds stress to a rider’s lower back.
Butterfly handlebars (also known as trekking bars) are seeing a rise in popularity. Because of their butterfly or figure eight design, these bars provide riders more spots to place their hands–7 for butterflies versus 3 for drop bars. Butterfly bars are wider, giving a rider additional leverage.
However, the extra length and additional metal comes with a price–extra weight. Butterfly bars can weigh up to 40% more than drop bars.
Some tour riders prefer flat bars for a more comfortable riding position. If you prefer to ride upright, then drop bars could put pressure on your back that you aren’t used to. And while flat bars are less aerodynamic, touring is about scenery. If you want to get someplace fast, a car will get you there quicker.
Consider Going Clipless
A clipless pedal system lets you attach cleats into clips designed for that purpose. Since your shoes will be attached to the pedal, you can pull up the pedals during the stroke. So on the first half of a pedal stroke you use your quads.
An advantage of the clipless pedals is the ability to push through the first half of the pedal stroke with your quadriceps and use your hamstrings and hip flexors during the second half of the pedal stroke. Being able to use all three muscle groups helps to improve the efficiency of your pedaling.
Another advantage, especially in rainy circumstances or rugged terrain, is to ensure that your foot doesn’t slide off your pedals. Finally, if set up correctly, you’ll always position your foot accurately with a clipless pedal.
What Makes a Gravel Bike Different From a Touring Bike?
Gravel bikes are different from touring bikes because they have hydraulic brakes, wide tires, and dropped saddles. Touring bikes, on the other hand, feature mechanical disk brakes, mudguards, luggage mounts, and upright seating.
In addition, elements such as the frame material and the geometry of the bikes are also different.
The table has a side-by-side comparison of the differences.
| Component | Touring Bike | Gravel Bike |
| Brakes | -Touring bicycles have mechanical disc brakes, which are easier to maintain than hydraulic ones. -Easy maintenance and replacement are essential in touring bikes, especially if the cyclist is 100 miles (161 km) or more from home. | -Hydraulic disc brakes are standard on gravel bikes and provide consistent and dependable braking. -They also offer room for the wide tires needed for gravel bikes. |
| Gears | -Touring bikes have a large range of gears, with triple front cog and anything between 7 to 10-speed rear cassettes. | -The gear range will be similar, but the needs of gravel bikes are such that manufacturers offer dedicated group sets. -Gravel bikes ideally have between 12 to 18 gears. They don’t have a front derailleur to reduce weight. -Less can go wrong on a simple system. |
| Mudguards | -A touring bike needs mudguards. Mudguards will keep you cleaner and more comfortable on wet days. -Tour bikes come with mount points to mount mudguards. | -Gravel bikes don’t have mudguards, although some have mounts in case a cyclist wants to add them. -Other mounting points might include some for tool kegs, water bottles, or extra bottle cages. Some have mount points for luggage or lights. |
| Saddle | -Touring bike saddles have an upright seating position for maximum comfort for long tours. | -Gravel bikes often have a dropper seat post so the rider can move the seat up or down as needed. -These are typically controlled by a lever so that the rider can get it out of the way on steep terrain. |
| Tires | -Touring bikes have rugged wheels with a high spoke count. Tubeless is good, but a puncture protection belt is better. | -The large tires can run on air pressure as low as 40 psi, increasing traction and making for a more comfortable ride. -Gravel bike tires are often tubeless to avoid having the inner tube become trapped between the tire and rim. |
As you can see, there is much more to touring and gravel bikes than simply their tire size or mudguards. Bike geometry deserves its own section, so let’s explore that topic.
What Is a Bike’s Geometry?
A bike’s geometry is the angles and distance between the parts of a frame. The arrangement of these angles and distances determines what kind of terrain a bike can handle. The geometry also influences the speed, stability, body posture, and other components of riding.
Furthermore, you’ll not be comfortable and might have back difficulties and leg issues if you spend a lot of time in a bike frame that is too large or too small.
Books, like Bicycling Science available on Amazon.com, have been written about bike geometry, so this will be a brief overview.
- Top tube length. The horizontal distance between the center of the seat post and the head tube.
- Stack height. The vertical distance from the bottom bracket to an imaginary horizontal line of the top tube length.
- Seat tube length. The distance from the top of the seat tube to the bottom bracket. Seat tube length determines the minimum and maximum seat heights for a bike. It’s more accurate than small, medium, large bike sizes.
- Reach. The reach determines how roomy a bike will feel. Visualize an imaginary vertical line from the bottom bracket and a horizontal line from the top of the head tube. The reach is the distance where the two would meet.
- Front Center. The distance between the front axle and the center of the bottom bracket.
- Rear Center. The distance from the rear axle to the center of the bottom bracket is sometimes called the chain stay. It’s a crucial measurement for touring bikes. A more extended chain stay provides adequate room for the panniers.
Most touring bikes have chain stay lengths between 17.5-18.5 inches (445-470 mm). So ideally, your gravel bike should have a length close to that. A bike that has a chain stay of 16.5 inches (425 mm) will work. But anything shorter, and your legs begin to rub against the pannier as you ride.
There are additional angles and lengths in bicycle geometry. Those include the head, seat, and a variety of spoke angles. A discussion of bike geometry can consist of the sagged geometry, which refers to the subtle changes that occur when a rider sits on a bike. And the dynamic geometry refers to how the angles change in accordance with the terrain.
However, in converting a gravel bike, the most important part of a bike’s geometry is the wheelbase, or the combination of front center and chainstay.
Bottom Line
You can use gravel bikes for touring bikes, but they do have their limitations. For one thing, you won’t be able to carry as much, which means shorter tours. To have a successful tour, you’ll need to modify your gravel bike so you can carry more gear. Also, you’ll need to switch out tires and make some additional adjustments.
Still, by modifying your gravel bike, you’ll save money that you can use toward your journey. And it’s the journey that really counts.
Other articles you may find interesting:
What Is a Good Weight for a Touring Bike?
Can Gravel Bikes Go on Trails?
Sources
- Bike Radar: What is a Touring Bike?
- Bike Radar: What is a Gravel Bike?
- Cycle Travel Overload: Gravel Bike vs. Touring Bike—What is the Difference?
- Bikexchange: Gravel vs. Cyclocross vs. Touring – What are the differences?
- REI: How to Choose Bike Tires