
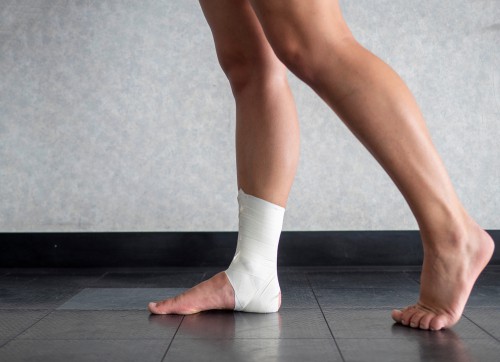
Cyclists seeking extra protection for a vulnerable ankle often tape an ankle when they need to protect their injured ankle. It’s good to tape an ankle before cycling as it also helps stabilize the ligaments and avoid injury. Taping an ankle is easy but requires careful taping to ensure an ankle gets proper coverage.
Here’s a step-by-step process of how to tape an ankle for cycling:
- Gather your tape, scissors, and get someone to assist you.
- Elevate your leg at a 90° angle on a prop for your foot.
- Layer your ankle with the pre-wrap twice.
- Wrap two anchor pieces of tape.
- Make a stirrup beneath the heel to prevent lateral twisting.
- Make a heel lock (add another layer if using athletic tape).
- Add another heel lock from the ankle’s inner side.
- Close off your ankle tape using the figure-8 method.
This article will provide in-depth instructions for taping an ankle for cycling. If you have a prior ankle injury, taping your ankle can help you continue cycling while reducing pain and preventing further damage. If you have no injuries but you want extra support, taping your ankle is an excellent option for you, too.
1. Gather Your Tape, Scissors, and Get Someone To Assist You
Before taping your ankle, you need to make sure you have all the required materials. Collect these listed materials before beginning to tape your ankle:
- Athletic tape or kinesiology tape for your ankle
- Pre-wrap if you’re using athletic tape
- Scissors for cutting the tape
- Someone to help you (if possible)
- A place to sit
- An object to prop your leg
Athletic Tape or Kinesiology Tape for Your Ankle
Athletic tape or kinesiology tape are both excellent materials for taping an ankle. However, they both serve very different purposes, so it’s essential to get the type of tape that suits your needs.
While athletic tape provides support and structure, it’s not elastic, so moving around in it is rather restrictive. On the other hand, kinesiology tape is much more flexible and provides enough restriction to support the ankle. If you aren’t sure which kind of tape you need, keep reading after the list to learn more.
Scissors for Cutting the Tape
Scissors are necessary to cut the athletic tape. If you don’t have access to scissors, you could tear the tape by hand. However, it can be tricky, depending on the tape, so having scissors nearby is preferred. Cutting the tape with scissors will also help you tape your ankle quickly and easily. Be sure to handle scissors with caution to avoid injury.
I recommend the Cramer bandage scissors from Amazon.com as they’re great for cutting athletic tape. The scissors’ flat tip ensures safety when in use. Additionally, they come with netted pockets that are elastic on both sides, allowing easy access the next time you need to look for your gear.
For precise cutting of the kinesiology tape, I recommend using the 3B Scientific Stainless Steel Kinesiology Taping Scissors from Amazon.com. Their stainless steel body means they’re sturdy and eco-friendly. Thanks to their black carbon and fluorine resin, you don’t need to worry about your scissors having glue residue from the tape.
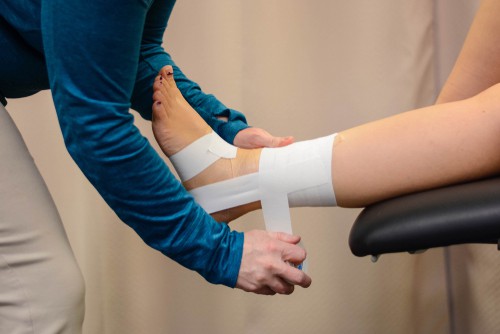
Get Someone To Help You (if Possible)
Although it’s possible to tape an ankle by yourself, it’ll be much easier to accomplish if you have someone to help you. But make sure they can understand the process. Your leg should be as straight as possible when taping the ankle, and the process is much easier if you have someone to help you.
A Place To Sit
Finding a comfortable and sturdy place to sit is essential for an accurate tape job. Designate an area where you can sit and be able to elevate your leg. It’s possible to sit on the floor while taping an ankle, but sitting on a chair will make the job easier, especially if you have someone assisting you. Don’t attempt to stand while taping your ankle. This could result in loss of balance and injury.
An Object To Prop Your Leg
You’ll need to elevate your leg so that you can stabilize your foot and ankle before taping it. Find an object that you can prop your leg on. A footstool or a chair would be ideal for elevating the leg.
The goal is to find something that will allow you to find stability before you begin the process of taping the ankle. Ideally, the object should be as tall as the seat you’re on so you can easily extend your leg straight.
2. Elevate Your Leg at a 90° Angle on a Prop for Your Foot
Once you’re seated comfortably, elevate your leg on the object you’ve chosen to prop your foot upon. Having your foot propped up will allow you to stabilize the ankle and foot.
Keep your foot in a neutral position angled at 90 degrees. Be sure to keep your foot as still as possible when taping the ankle. This will allow you to tape the ankle so it stays in this neutral position.
The goal is to use the tape to reduce movement in the ankle. So you want to tape the ankle into a position that’s comfortable and supported.
3. Layer Your Ankle With the Pre-Wrap Twice
If you’re using kinesiology tape, this step can be disregarded. Since the athletic tape is much stickier than kinesiology tape, it can be a lot more challenging to remove. Using pre-wrap before taping the ankle can make the removal process more manageable.
Just take the pre-wrap and wrap it around your entire ankle and heel. Layer the pre-wrap twice, then seal it using athletic tape.
This will protect your skin and leg hair from any damage the tape could cause. If you aren’t sure which brand of pre-wrap to use, try OBTANIM Sports Pre-Wrap on Amazon.com. This easy-to-use elastic pre-wrap is affordable and comes in four different colors.
4. Wrap Two Anchor Pieces of Tape
If you’re using kinesiology tape, you can skip this step. But if you’re using athletic tape, wrap an anchor piece above the ankle. The length should be long enough to circle the ankle completely. Be sure to place this tape over the pre-wrap to prevent sticking to the skin or leg hairs. However, make sure the tape is high enough on the ankle to stay in place if the ankle moves.
Then, wrap the second piece of tape slightly overlapping first. Once again, make sure that the tape won’t move if the ankle moves. These two pieces of tape will serve as the anchors for your ankle wrap.
5. Make a Stirrup Beneath the Heel To Prevent Lateral Twisting
To make a stirrup beneath the heel, follow these steps:
- Cut a 10-inch (25.4 cm) piece of athletic or kinesiology tape. This will be used to create a stirrup beneath the heel.
- Locate the center of the tape and stick it beneath the heel. Make sure the foot is in a neutral position at a 90-degree angle.
- Bring the two sides of the tape up towards the anchor tape.
- Create tension by gently pulling the tape tight as you apply it to the skin. Try to avoid leaving creases when doing this.
The goal of the stirrup is to stabilize the ankle joint and prevent lateral twisting. A second stirrup should be added for extra stability.
6. Make a Heel Lock (Add Another Layer If Using Athletic Tape)
Using a 10-inch (25.4 cm) piece of athletic or kinesiology tape, create a heel lock. To achieve this:
- Start by attaching one end of the tape to the anchor tape on the outside of the ankle.
- Instead of crossing over the heel like with the stirrup, angle the tape towards the foot’s arch.
- Pulling the tape to create tension, cross the tape up around the arch and across the ankle.
- Connect the tape back to the outer side of the ankle where that piece of tape began.
The heel lock should form a “figure-6”. If you’re using athletic tape, you should add a second or third heel lock for more stability.
7. Add Another Heel Lock From the Ankle’s Inner Side
An additional heel lock coming from the inner side of the ankle should be added to stabilize the ankle. This is done in the exact same way as the last step but starts on the inner side of the ankle instead.
Follow these steps:
- Take a 10-inch (25.4 cm) piece of athletic or kinesiology tape and attach it to the inner side of the anchor tape.
- Pull the tape to create tension.
- Cross the heel at an angle and bring the tape up around the arch of the foot.
- Pull the tape across the ankle.
- Attach it to the beginning of the piece of tape on the inner side of the ankle.
Just like the last heel lock, the tape should form a “figure-6”. When using athletic tape, apply a second heel lock in this direction for extra support.
8. Close Off Your Ankle Tape Using the Figure-8 Method
This step isn’t necessary if you’re using kinesiology tape. But if you’re working with athletic tape, you’ll want to reinforce the tape and add a few extra layers to close it off. The goal is to add as much stability to your ankle as possible.
An excellent method of closing off ankle tape is the “figure-8” method. Similar to the “figure-6” done with the heel lock, the figure-8 will begin on one side of the anchor then cross under the heel. To do this, follow these steps:
- Bring the tape up over the arch, then across the ankle.
- Instead of taping the piece back to that same side, continue the motion around the ankle and back over the foot to form a figure-8.
- Repeat this motion until the ankle feels adequately supported by the tape.
Tips on Choosing Your Tape
After reading the step-by-step instructions, you may still feel unsure about what type of tape you should be using. As mentioned above, both types have varying elasticities and serve different purposes. You want to be sure to choose a tape that fits your needs.
Once you recognize the reasons you need to tape an ankle, you can decide which type of tape is suitable for you.
Use an Athletic Tape if You Have a Recent Injury
Athletic tape is the least elastic of the two types. If you have a recent injury, athletic tape is ideal for holding your ankle in place, as it’ll fully restrict movement. Since athletic tape cannot stretch, it can maintain substantial support for active athletes.
If you’re unsure where to get the athletic tape, check out your local sports store, or buy this Affordtex Flex Trek Gear Athletic Tape from Amazon.com. Flex Trek Gear makes a high-quality athletic tape used by professional athletes and coaches worldwide. Their tape is easy to tear and highly durable.
Use a Kinesiology Tape for Better Ankle Support
Kinesiology tape is best used for recovering injuries or to provide extra support. A cyclist with injury-prone ankles would benefit from this to help add stability to the ankles. This tape is stretchy and elastic, providing a flexible yet controlled range of motion.
Because kinesiology tape is waterproof, it only needs to be changed less frequently than athletic tape and can stay in place for up to 5 days. A great brand of kinesiology tape to check out is SB SOX Kinesiology Tape on Amazon.com. This affordable tape comes in a variety of 9 different colors. SB SOX also features the #1 recommended material and is the most popular brand amongst professional athletes.
The Benefits of Taping an Ankle for Cycling
Cyclists tend to be more prone to ankle injuries than non-cyclists. Taping the ankles as a cyclist can be used as a preventative or therapeutic action. Wrapping the ankles can create support, lowering the chance or severity of sprains.
This preventative measure can also be used to reduce the risk of Achilles tendonitis, which is a common issue among cyclists.
The condition causes the Achilles tendon to become painfully inflamed from overuse. This can happen with cyclists who train too hard too quickly and those whose bikes aren’t correctly sized. By taping the ankles, a cyclist can prevent or lower the severity of an Achilles tendonitis outbreak.
If used for therapeutic purposes, ankle taping can benefit cyclists who’ve been recently injured but want to continue cycling. It’s also used for cyclists who healed from an injury and want to ease back into activity. When cycling with a sprained or injured ankle, taping the ankle is vital to avoid further damage to the ankle.
Even if you aren’t injured, you can tape your ankles while cycling to avoid injury. Because cycling can strain the ankles, taping can be valuable.
Take preventative action so you can avoid severe sprains and strains while cycling.
Final Thoughts
Taping an ankle for cycling doesn’t need to be a complex process. You can tape your ankles in just minutes and start cycling by having all the necessary materials (and perhaps a friend to help you). Whether you’re using an athletic or kinesiology tape, use the ankle wrap methods detailed in this article to support injured or weak ankles.
Even if you don’t have a prior ankle injury, taping your ankles can help to provide you with extra support while cycling. Taping can prevent future injuries or help relieve pain from current ones.
Other articles you may like: